Product guide
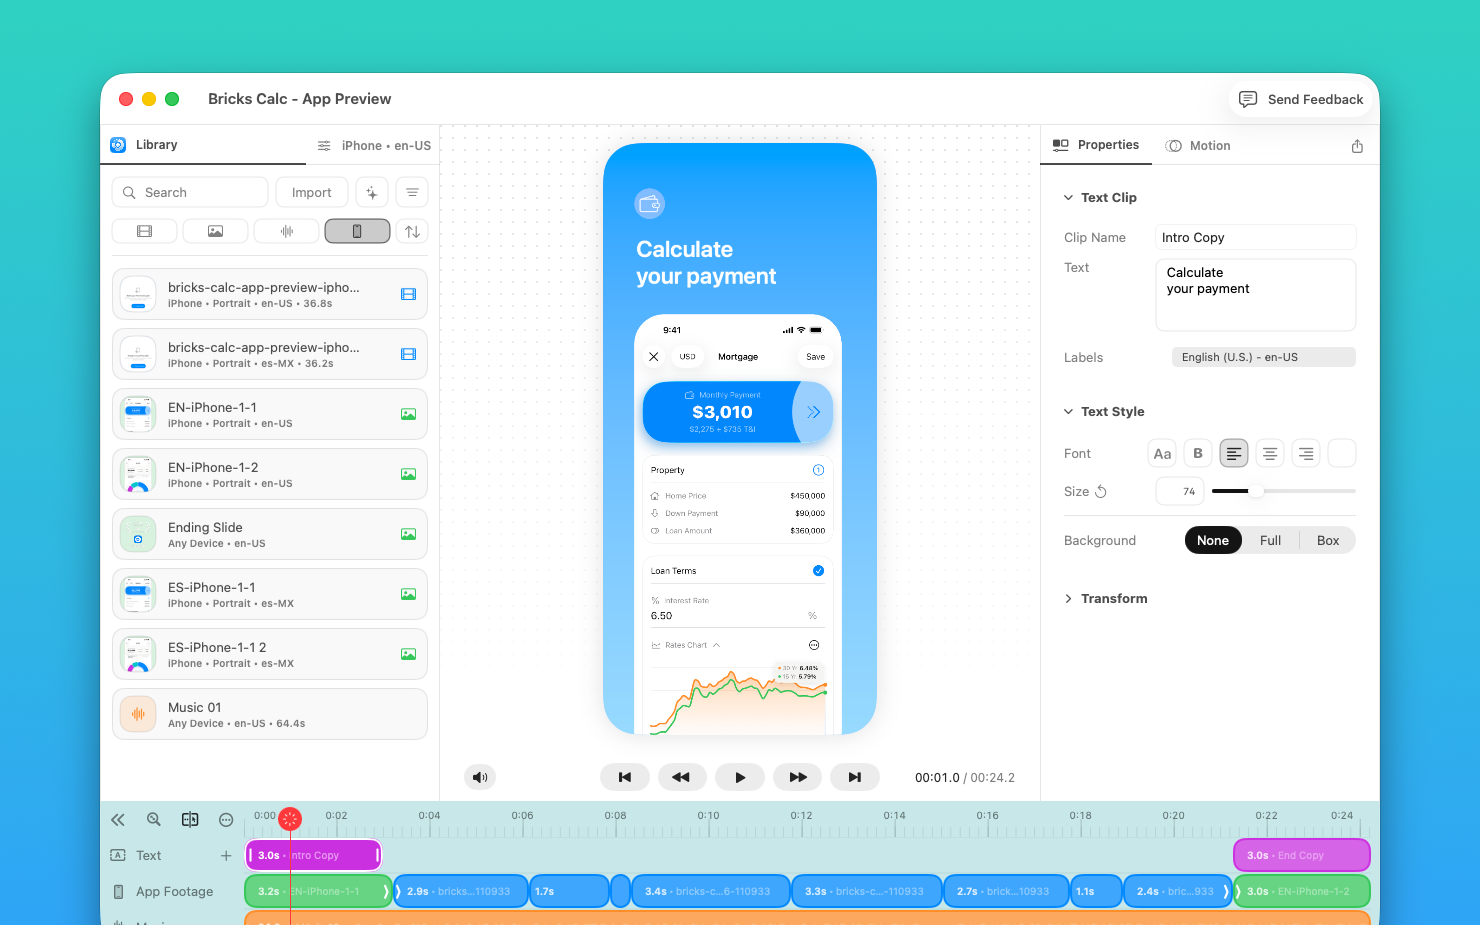
Get started with App Preview Editor.
See the full workflow, then build your first App Preview with confidence.
Quick walkthroughSee the complete workflow first
DropImport recordings, screenshots, and audio
EditShape a focused App Preview
UploadValidate and send the finished variant
Watch the quick start.
This walkthrough shows the complete App Preview Editor workflow in one place.
Watch it once before opening your first project. Then return to the sections below when you need a concise reminder.
Start with your source media.
Collect the recordings, screenshots, and audio you need for one clear product story. Drag them into App Preview Editor to create a first editable timeline.
Keep the first project small.
Choose one important workflow and the few screens needed to explain it. A focused first project makes the editing decisions easier to understand.
Use clean captures.
Hide notifications, personal information, debug tools, and unfinished content before importing your media.
Shape a clear App Preview.
Arrange the clips in story order. Split or trim anything that delays the next useful moment, then add only the text and motion that help someone follow the app.
Review the story without sound.
The main value should remain understandable when muted. Use captions when the interface alone does not provide enough context.
Keep every variant in the project.
Reuse the project when you need another device size, language, or App Store update. Replace the media that changed instead of rebuilding the edit.

Validate, export, and upload.
Run the built-in checklist before delivery. Resolve the issues it finds, review the finished video once more, and choose the correct App Store Connect preview slot.
Keep learning
Continue with the production guide that matches what you are working on now.